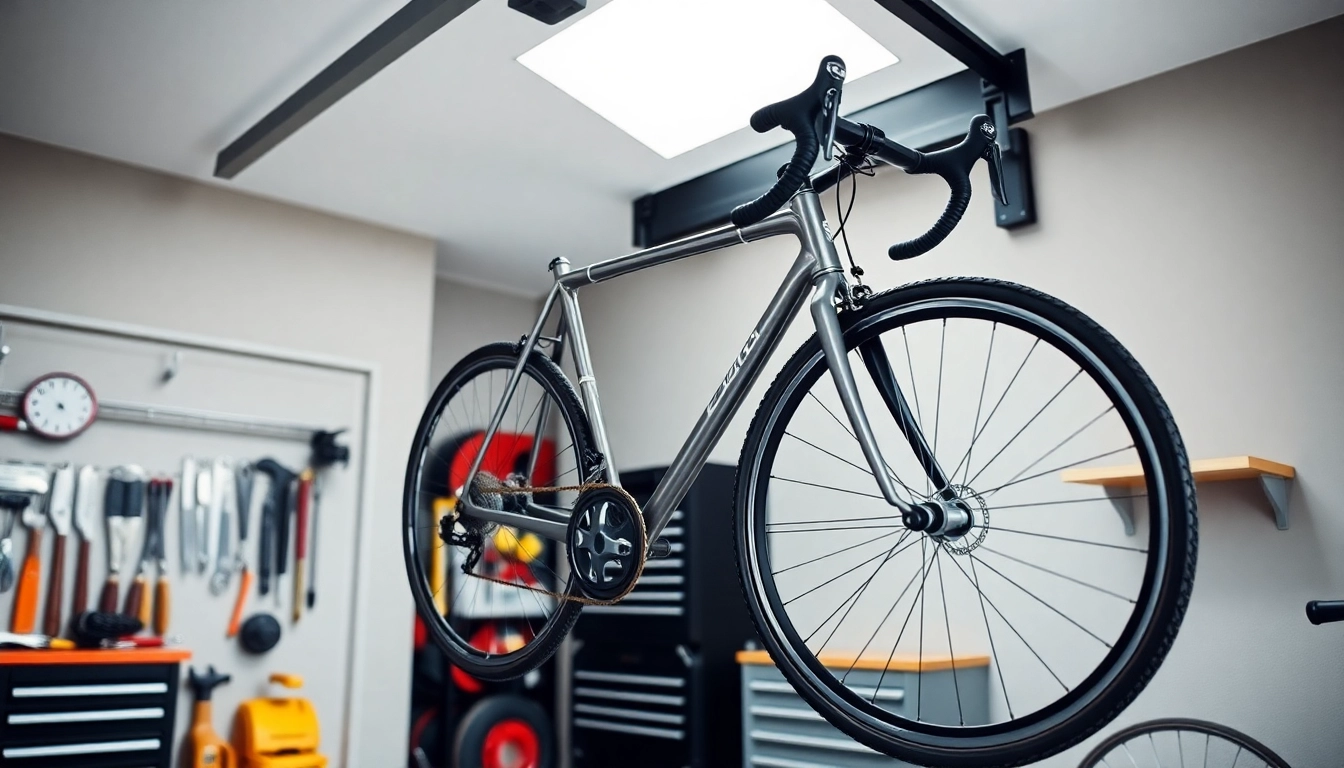
Understanding the Importance of a Bike Wall Mount
When it comes to storing bicycles, having an efficient system is crucial for both space-saving and bike protection. A Bike wall mount is a fundamental solution for any cyclist wishing to keep their bikes safe and organized. Wall-mounted bike storage displays countless benefits, ranging from conserving floor space to protecting bikes from damage and wear.
Benefits of Using a Bike Wall Mount
Implementing a bike wall mount system in your home or garage offers several advantages:
1. Space Efficiency: By elevating your bike off the floor, a bike wall mount creates additional space in your home for other activities or storage. This is particularly beneficial in smaller living areas, where floor space is often at a premium.
2. Protection from Damage: When bikes are stored on the ground, they are susceptible to accidental falls, scuffs, and other damages. Wall mounts, especially those that cradle the bike frame, minimize these risks.
3. Accessibility: Easily display your bike for quick access. There’s no need to navigate around items cluttering the floor, allowing for seamless retrieval and storage.
4. Enhanced Organization: A wall mount can be part of an organized storage solution, helping to keep your biking gear easily accessible and tidily arranged.
5. Aesthetic Appeal: Displaying your bike as part of the room’s decor can enhance the space’s aesthetics. Many mounts are designed to be visually appealing, and they can become a conversation starter among friends and family.
Types of Bike Wall Mount Available
There are various styles of bike wall mounts to consider, each catering to specific needs and preferences:
– Horizontal Wall Mounts: These versatile mounts hold the bike parallel to the wall, giving a streamlined look. They fit well in spaces that have adequate width.
– Vertical Wall Mounts: Ideal for tighter spaces, vertical wall mounts store bikes upright, allowing cyclists to maximize floor space while showcasing the bike.
– Hanging Racks: Using hooks or cradles, hanging racks offer a playful and flexible storage option. They can conveniently hold multiple bikes in a compact arrangement.
– Adjustable Wall Mounts: These mounts provide flexibility with adjustable height and spacing, making them suitable for families with bikes of different sizes.
– Floor-to-Ceiling Systems: For those seeking maximum storage, floor-to-ceiling systems can accommodate several bikes and other cycling gear in a single unit.
Choosing the Right Location for Installation
Selecting an ideal location for your bike wall mount hinges on several considerations:
1. Accessibility: Ensure the mount is easily reachable. Avoid high placements if you regularly use the bike.
2. Wall Type: Confirm that your wall can securely support the bike’s weight. Stud-mounted options are typically more robust than those installed directly in drywall.
3. Clearance Space: Protect the bike from impacts by leaving sufficient space around it. Consider door swings and foot traffic areas when making your selection.
4. Lighting Considerations: Brightly lit areas can prevent shadow and damage, making it easier to access your bike.
How to Install a Bike Wall Mount
Installing a bike wall mount may seem daunting, but it can be accomplished effectively with the right tools and a clear step-by-step guide.
Essential Tools Required for Installation
Before getting started, gather the following tools:
– Stud finder
– Power drill or manual screwdriver
– Level
– Measuring tape
– Pencil for marking
– Safety goggles
Having these tools on hand will facilitate a smooth installation process, ensuring accuracy and safety.
Step-by-Step Installation Guide
Follow these instructions closely for an optimal installation:
1. Select the Location: Use the guidelines for choosing a location to find the best spot for your mount.
2. Locate the Studs: Use the stud finder to identify wooden studs behind drywall. Mark the position with a pencil—ensure the mount aligns with these for proper support.
3. Measure Your Height: Using a measuring tape and level, mark where the top of the bike will sit to gauge the height for the mount.
4. Install Mounting Bracket: Depending on your mount type, align and secure the bracket with screws. Ensure it’s level before fully tightening.
5. Hang the Bike: Once the bracket is in place, hang your bike according to the manufacturer’s instructions.
6. Final Adjustments: Ensure everything is secure and make any necessary adjustments to the position for optimal balance.
Common Mistakes to Avoid During Installation
While mounting your bike wall mount, there are common pitfalls to watch out for:
– Not Using a Level: An unlevel installation can lead to crooked mounting and difficulty in using the bike later.
– Ignoring Wall Types: Failing to consider wall strengths can result in inadequate support, risking damage to the bike or wall.
– Skipping Safety Gear: It’s essential to wear safety goggles during the drilling process to protect against debris.
Maintaining Your Bike Wall Mount
Keeping your bike wall mount in prime condition is vital for longevity and performance. Here are essential maintenance tips.
Regular Maintenance Tips
Routine checks can prevent larger issues down the line:
– Inspect for Damage: Regularly inspect the wall mount for signs of wear, looseness, or cracks. Tighten screws and bolts as necessary.
– Avoid Overloading: Overstuffing the mount with additional gear can compromise its stability. Adhere to weight limits.
– Check Wall Integrity: Ensure that the wall hosting your mount remains firm and intact without signs of unnecessary wear or water damage.
Cleaning and Care for Longevity
Just like your bike, bike mounts benefit from regular cleaning. Here’s how to maintain yours:
– Dust Regularly: Wipe down the mount monthly to avoid dust buildup and potential rusting.
– Use Gentle Cleaners: Avoid harsh chemicals. A simple mixture of warm water and mild soap works well for cleaning.
Recognizing Signs of Damage
It’s crucial to recognize warning signs that may indicate your bike wall mount needs attention:
– Loose Screws or Bolts: If screws feel loose or wobbly, it’s time to tighten or replace them.
– Visible Cracks: Regularly inspect the mount; signs of cracking or warping indicate it’s time to replace the unit.
– Rust or Discoloration: Metal components should be free of rust and corrosion. Such issues may signify that the mount is compromised.
Maximizing Space with a Bike Wall Mount
Implementing strategic organizational tactics can enhance the utility of your bike wall mount.
Organizational Tips for Small Spaces
For environments where space is limited, consider the following:
– Utilize Vertical Space: Position multiple mounts vertically to create a layered bike storage system.
– Combine with Hooks: Utilize hooks on the wall for additional gear such as helmets or cycling apparel adjacent to the bike for a cohesive setup.
– Incorporate a Shelf: Above your bike mount, a small shelf can hold tools or bike accessories, optimizing organization without consuming more floor space.
Integrating Additional Storage Solutions
Think beyond just wall mounts by incorporating supplementary storage solutions:
– Bike Carts: For those with multiple bikes, a bike cart can complement wall mounts for easily manageable storage.
– Storage Bins: Create a dedicated bin for items like tire pumps, maintenance kits, or bike locks, neatly stowing them in proximity to bikes.
– Pegboards: Use pegboards near the mount to keep small items organized, visible, and off surfaces.
Enhancing Aesthetics with Decor
A well-placed bike wall mount can also contribute to your space’s decor:
– Color Coordination: Match the mount or brackets with the color scheme of your space for a cohesive look.
– Artwork Integration: Frame the bike’s display with artwork or photos to create a stylish focal point in the room.
– Lighting: Ambient lighting can further highlight your bike, creating an eye-catching display that adds character to the room.
Choosing Quality Over Price for Your Bike Wall Mount
When investing in a bike wall mount, it’s essential to prioritize quality to ensure longevity and safety.
Materials and Durability Considerations
Various materials offer different levels of durability. Here’s what to consider:
– Steel vs. Plastic: Steel mounts tend to provide more strength and durability compared to cheaper plastic alternatives. However, lightweight options may suit some scenarios when appropriately installed.
– Finish Quality: Powder-coated finishes resist corrosion and wear better than non-coated surfaces, ensuring longevity.
– Weight Ratings: Always check the manufacturer’s weight ratings to ensure the chosen wall mount can safely support your bike’s weight.
Comparing Features and Prices
When selecting a bike wall mount, consider the features offered versus their price:
– Adjustability: Some mounts offer adjustable heights and angles, which are beneficial for accommodating various bike sizes or users.
– Security Features: Look for mounts that incorporate anti-theft features, a wise investment for high-end bicycles.
– Warranty: A warranty signalizes the manufacturer’s confidence in their product’s quality. Longer warranties often indicate better durability.
Customer Reviews and Recommendations
Leveraging customer insights is beneficial when selecting your bike wall mount:
– Look for Patterns: Pay attention to repeated comments across reviews. This can indicate commonalities in durability and usability.
– Ask for Recommendations: Friends or fellow cyclists can provide valuable recommendations based on personal experiences, ensuring you make an informed decision.